Information Covered
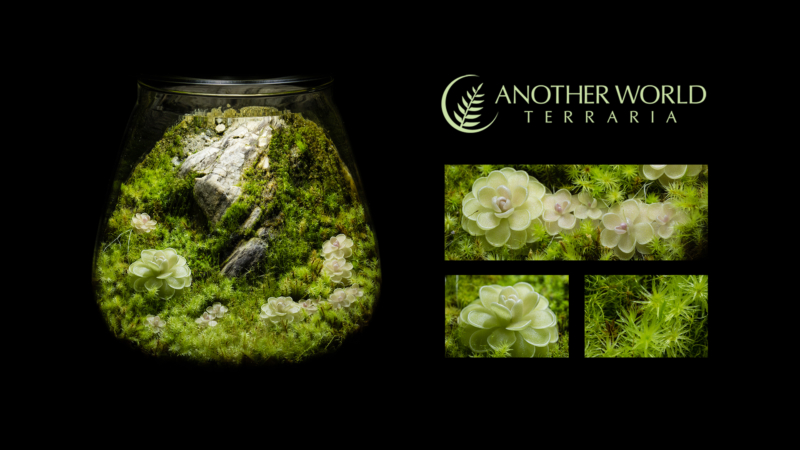
Detailed explanation of how I built the Cliffside Ping Jar terrarium
Video contains photos, examples, tips and tricks, info about materials, construction, substrate, plants, lighting, fertilization, watering, and more.
Materials and Tools list:
- Glass jar
- Rock – as primary hardscape element
- Touch ‘n Foam Landscape – polyurethane expanding foam
- Hygrolon – for background covering (wicks moisture and is well aerated for plant roots)
- Aquarium safe silicone – for securing rock in place
- Gorilla Glue Clear Grip – for affixing Hygrolon to background
- Silicone Brush – for applying Gorilla Glue
- Knife / tools – for carving the foam
- Sewing pins – to hold Hygrolon in place
- Clear plastic bag – for masking the jar
- 3M multi-surface painter’s tape – for securing the plastic bag
- Sand (fine grain and large grain) – for substrate mix and background work
- Tiny pebbles – for substrate topping
- Peat Moss – for substrate mix
- Safety glasses – for working with spray foam
- Nitrile gloves – for working with adhesives and spray foam
- Respirator – for working with Silicone and Gorilla Glue
- Glass petri dish – to use as a lid
- LED puck light – 240 Lumens, daylight
- Digital Timer – 13 hour photoperiod
- Spray bottle – for distilled water misting
- Grow More Urea-Free Orchid Fertilizer (1/2 strength in distilled water) – for misting Pinguicula and moss every few weeks
How I made it
NOTE: In order to see the photos referenced in the article below, please watch the video.
I wasn’t planning on making a behind-the-scenes for the Cliffside Ping Jar because I don’t have any video footage of the creation process. However, a lot of people have been asking me how I made the terrarium, so I’ve decided to explain it by showing some photos I took at intermittent stages during the build. Unfortunately many of the steps are not documented with photos either, but I’ll describe them in detail and try to include examples from other builds to better illustrate what I’m explaining.
With that said, I appreciate your understanding that I’m trying to piece this together as best I can despite relatively little documentation, and I’m hoping you’ll find it useful and learn something. Let’s get started.

I found the glass jar at a local hobby store, along with a bunch of other containers.
It came with a cork lid which I removed and would later replace with a glass petri dish, which you’ll see later in the video.
The jar dimensions are approximately 6″ tall by 5.5″ wide at the bottom, by 4″ wide at the mouth.
I got the centerpiece rock at an aquarium supply store
Next I wanted to glue the rock in place so the hardscape would be secured and wouldn’t move or break the glass
For this I used aquarium safe silicone. Avoid the ones with mold inhibitors and other chemicals.
As always, when working with chemicals I would recommend using safety glasses, gloves, and in cases where there are fumes, a respirator. Also try to work where there is some ventilation and air flow so the fumes don’t gather.
After putting silicone on the bottom and back of the rock, I positioned it inside the jar.
Then I wedged a few pieces of Seachem Flourite under the edge of the rock to prevent it from sliding while the silicone cured.
Next I needed to spray some polyurethane expanding foam to use as a background around the rock
Before spraying the foam, I needed to mask off any areas that I didn’t want the foam to get on. To do this, I wrapped the jar in a plastic bag and then folded the top of the bag inside.
I secured the bag in place with blue 3M multi-surface painters tape. This is a great tape for using on delicate surfaces and places that you don’t want adhesive residue on.
Then I used an Exacto knife to cut out a part of the plastic bag for the area around the rock and sides where the foam would be.
The foam I used is Touch ‘n Foam Landscape, which is a dark gray, almost black. I prefer it over the Great Stuff foam which is a cream color, because the dark gray is easier to conceal, and it is less noticeable from the outside of the terrarium.
Unfortunately I don’t have a photo of the bare foam around the rock. Here’s a photo of the Touch ‘n Foam being used in a different terrarium build, so you can see what it looks like.
Sometimes the results and behavior of spray foam can’t be predicted, since a number of factors affect the outcome. In the case of the ping jar, the curved shape of the glass, coupled with some foam contraction during curing, resulted in the background pulling off the glass after a day or two. To attach it back in place, I put some silicone between it and the glass and applied pressure until cured. Next I carved the foam into the shape I wanted for the background.
Here’s a photo of partially carved foam in a different terrarium. For carving the foam, you can use knives, dremel, sandpaper, and other tools. Be careful not to damage the glass and other finished surfaces when working on the foam. Also, if you are using a dremel or sandpaper, wear eye protection, a dust mask, and have a shop vac running to suck up the particles of foam.
Unfortunately the next photo I have skips a lot of the steps I’m going to describe, but I’ll bring it up now so you can look at it while I explain everything.
Next I cut a Hygrolon pattern to fit around the rock and slightly onto glass around sides and top. You can do this by estimating a rough size and shape by eye, then cutting a slightly larger piece out with scissors. Then place the Hygrolon in and start forming it in place, and gradually trim bits away until it’s just right. Remember to account for curvature, bends, folds, and so on so you have enough material to cover everything.
Note that I shaped the Hygrolon so it reaches the bottom of the terrarium, so any water in the bottom will wick up and keep the background moist.
Then I needed to attach the Hygrolon to the foam and glass.
My preferred adhesive for that task is Gorilla Glue Clear Grip.
I applied the glue over the foam and just a bit on glass, using a Silicone brush. These types of brushes are great because many chemicals will peel off the bristles after they are cured, so the brush can be reused.
Here’s a shot from my drip wall tank build which illustrates a method of attaching Hygrolon to contoured surfaces using sewing pins. By the way I have an entire series of videos which teach you exactly how I built the drip wall from start to finish. For the Ping Jar, after applying the Gorilla Glue Clear Grip to the foam, I firmly pressed the Hygrolon onto the background, fitting it to the contours of foam and glass. Then I placed some pins in to hold it in place, just like you see in the drip wall photo here.
Immediately after affixing the Hygrolon, while glue was still tacky, I applied sand over any areas where glue was exposed, particularly around the outside of the hygrolon where it meets the glass, and where it adjoined the rock.
To do that, I tilted the jar back so the background, rock, and hygrolon were horizontal, then sprinkled a bunch of sand over it. I pressed the sand firmly all around to embed it into the glue.
I let that cure for a day, then tilted the terrarium forward and gently shook it to remove any loose sand.
Then I carefully removed the pins by twisting them as I pulled so they break free and don’t pull on the Hygrolon too much.
Now that Hygrolon has been glued and cured onto the background, I wanted to conceal it more and add a natural appearance to the slope.
I applied Gorilla Glue Clear Grip over the entire surface of the hygrolon and then, as before, I tilted the jar backwards. While the jar was horizontal, I sprinkled a few larger grains of sand and tiny pebbles onto the Gorilla Glue, and pressed them in firmly.
Then over that I added more regular sand and pressed it firmly on.
After letting the glue cure for a day, I stood the terrarium up vertically.
Next I was ready to add the plants.
Pinguicula grow easily from leaf pullings. Pull some leaves off the mother plant, then lay them on a mix of wet sand and peat moss. Keep them humid and in bright light, and after a few months you’ll have new plants.
I already had several deli containers full of propagated Pings to use for this terrarium. Now I’ll show the freshly planted terrarium and explain more details.
The substrate I used in the terrarium was a mix of sand and a small amount of peat moss
I put a little substrate in the bottom of the jar and sloped it up over part of the background. You can see the slope in this photo.
Then I planted the Pinguicula all around the landscape. Although the planting may look somewhat random and may not appear to have a lot of thought behind it, it was very carefully thought out and uses a number of design principles. Here are some things about the arrangement that I want to point out which will help you learn to make more natural layouts.
- I placed the Pings asymmetrically, so the planting feels slightly random and doesn’t look controlled or planned
- I planted some small clusters, and some separate individuals, which is another attribute that prevents the composition from looking contrived and gives the illusion of a natural colony of plants growing in the wild
- I placed the larger plants and clusters so they were lower down at the base, and the plants going up higher gradually get smaller in size. This does two things, 1. it enhances the visual flow because the larger plants serve as an anchor and then the eye flows around following the smaller plants. Note that it would be visually jarring to see a larger plant higher up, and 2. the larger plants and groups at the bottom have more visual weight which offsets and balances the visual weight and shape of the stone
- I also placed a few smaller plants toward the outside mostly visible around the largest clump at bottom left. This replicates how a group of plants would gradually spread outward, with the youngest growth toward the outside, and that is a second reason why the plants going higher up are smaller, in addition to the visual flow reason noted earlier.
- The individual plants and clumps were positioned in a way that flows and somewhat echoes the hardscape, which gives the illusion that the plants naturally grew in around the rock.
Some of the Pings on the side and near the top were attached with super glue gel.
After everything was planted, I put more substrate mix around the pings to ensure the roots were covered, and adjusted the grade and shape of the slope until it looked right.
Then I placed sand and tiny pebbles all over the surface of the substrate, between the plants, and a bit up the background. Again, this looks random, but there was thought behind it. I used the same principles for the pebbles as I did with the plant positions and sizes. Note that the larger pebbles are mostly near the bottom. This does two things: 1. as with the larger plants at the bottom, the larger pebbles enhance the visual flow and balance of the composition, and 2. it looks more natural because larger particles would normally be found at the bottom of a slope.
The final step in planting was to add a few bits of moss and liverworts in between the Pings. I used species which were growing with the Pings in their propagation container because they looked natural and were suited to the substrate, lighting, and moisture levels needed for the terrarium.
After planting, I misted everything with distilled water.
Then I put a large glass petri dish on as a lid, and placed the light on top. I’ll talk more about the light in a bit.
Here’s an older photo which was taken several months after the terrarium was set up.
You can see that the moss had begun to fill in and some of the Pings were changing and adjusting to their new place. Some of the plants died back a bit at first due to the shock of transplanting and the change in conditions.
Here’s another shot some months later with even more moss growth and changes to the planting.
Some of the pings didn’t like the super glue, and also some of the spots higher up were not wet enough, so the plants in those areas suffered. Eventually I pulled a few of those Pings out that were dying back.
Now let’s talk about the lid and the lighting
You can see here that I used a petri dish as a lid for the terrarium, and I placed an LED light on top.
The light is a generic LED puck light bought on Amazon, approximately 240 lumens and daylight color balance.
The plants are given a photoperiod of 13 hours using a digital timer.
Now I’ll show you some of the most recent photos of the terrarium.
These were taken about 21 months after initial planting, which is about 1 ¾ years. A few months before this photo was taken, I removed a couple of Pinguicula which didn’t look as good and replaced them with a larger healthier plant. I also added a few bits of moss in some bare spots. Then all of that grew into what you see here.
Here’s a bit about the care of the terrarium
- Misting is done with distilled water when needed
- Everything is kept moist and in bright light
- Plants and moss are occasionally fed with 1/2 strength Grow More Urea-Free Orchid Fertilizer, mixed with distilled water.
- When the moss grows up the front and sides of the glass, I carefully trim it with aquascaping shears and remove the trimmings with tweezers.
More info about the Ping Jar
For specs and other info, see Cliffside Ping Jar portfolio entry


